Crop Image Free Online, No Signup
Drop a photo, drag the crop box to the exact framing you want, and download the result as PNG or JPEG. Lock an aspect ratio for Instagram, a passport photo or a thumbnail, and nothing leaves your device.
Crop your image
Drop a photo here
One image at a time, so each crop gets your full attention
Files are processed on this device only. Nothing is uploaded.
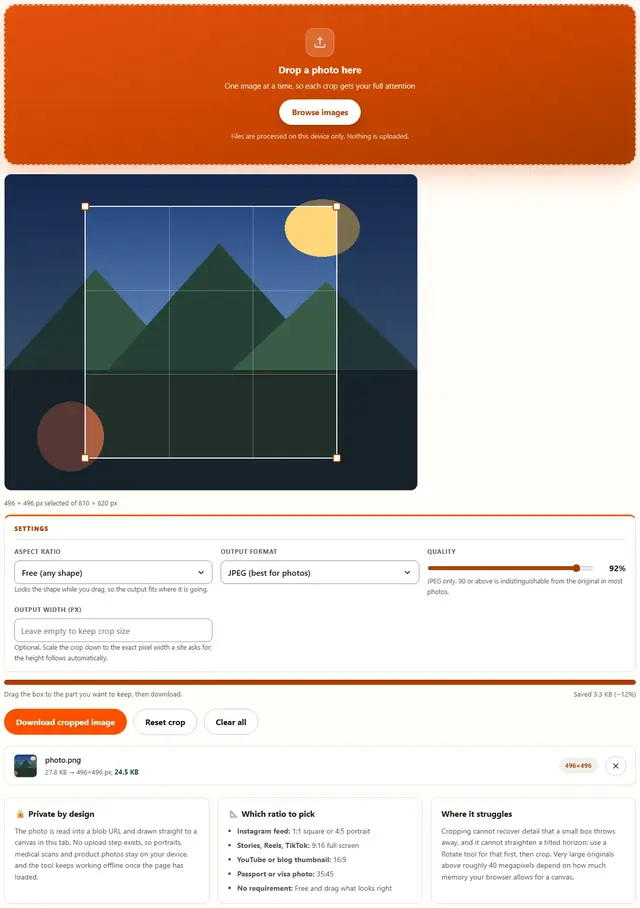
Locks the shape while you drag, so the output fits where it is going.
JPEG only. 90 or above is indistinguishable from the original in most photos.
Optional. Scale the crop down to the exact pixel width a site asks for; the height follows automatically.
Image Crop — illustrated, step by step
How to crop an image
Four steps, no accounts, no watermarks on the output.
Drop your photo
Drop a JPG, PNG or WebP on the box, or click Browse. The image appears immediately with a crop box already covering most of it.
Drag the box or the corners
Drag inside the box to move it, drag a corner to resize, or lock an aspect ratio first so the shape stays exactly 1:1, 4:5 or 9:16 while you position it. Arrow keys move the box and Shift plus arrows resize it.
Pick the output settings
Choose JPEG for photographs or PNG for transparency, set the quality, and optionally type an output width to scale the crop down to a site's exact pixel requirement.
Download
The row shows the crop size in pixels and the exact file weight before and after. One click saves the cropped image; nothing is uploaded anywhere.
Why crop in the browser?
Because a crop is usually the first step on a photo you have not shared yet. Keeping the edit in the tab means the original never touches a server, there is no queue and no account, and the result is ready the moment you release the mouse. Details are in our file-handling policy.
Troubleshooting
Are my photos uploaded when I crop them?
No. The file is read into the page with a blob URL, drawn to a canvas, and the crop is applied right here in this tab. There is no upload endpoint in the tool at all, so faces, documents and product shots never leave the device. Our file-handling policy has the details.
What aspect ratio should I pick?
Match the destination. Instagram feed posts are 1:1 square and 4:5 portrait, Stories and Reels are 9:16, YouTube thumbnails are 16:9, and a passport photo is 35:45 which the tool offers as a preset. If the destination has no requirement, Free lets you drag any shape you like.
Why does my cropped image look blurry?
Cropping never adds pixels: it removes them. If you drag a small 200 by 200 box out of a 4000-pixel photo and then display it at 800 pixels wide, it will look soft. Crop as tight as you need but start from the largest original you have, and export at the pixel size the destination asks for.
Can I crop several photos with the same box?
Not in one pass. Each image gets its own crop box because the framing that suits one photo rarely suits the next. Drop a new file, drag the box, download, repeat: the settings you chose carry over, so only the box changes.
PNG or JPEG for a cropped photo?
JPEG for photographs, because it weighs far less at the same visual quality and photos have no transparency to lose. PNG when the image has an alpha channel you need to keep, or when it is a screenshot with sharp text and flat colors that JPEG would smear.
Does cropping remove the metadata in my photo?
Yes, and that is usually what you want. The output is re-encoded from the canvas pixels, so EXIF data such as the GPS coordinates, camera serial and shooting time is not carried over. If you specifically need the metadata kept, crop is the wrong tool for that file.
Getting the crop right the first time
Cropping is the one edit that throws information away on purpose, so it pays to think about the destination before you drag. The aspect ratio selector is the fastest way to guarantee the result fits: pick 4:5 and no matter how you resize the box, the output is exactly the shape Instagram wants, which saves the second round of cropping most people end up doing after an upload gets rejected.
Two details catch people out. First, pixel size: the row under the preview always shows the crop in real pixels, so if it reads 180 by 180 you are about to export a thumbnail-sized file no matter how large the original was. Second, the output width box, which scales the crop down to an exact pixel width while keeping the ratio you locked. That is the control to use when a form demands a specific width rather than a specific shape.
| Destination | Ratio | Good output width |
|---|---|---|
| Instagram square post | 1:1 | 1080 px |
| Instagram portrait post | 4:5 | 1080 px |
| Story, Reel or TikTok | 9:16 | 1080 px |
| YouTube thumbnail | 16:9 | 1280 px |
| Passport or visa photo | 35:45 | 600 px |
| Product listing | 1:1 | 2000 px |
Crop, resize and compress: which tool does what
The three edits overlap in people's minds but do different jobs. Crop removes the parts of the frame you do not want and changes the shape. Resize changes the pixel dimensions of what is left, which is how a 4000-pixel photo becomes a 1080-pixel one. Compress keeps the dimensions exactly as they are and reduces the file weight by re-encoding more efficiently.
Most real workflows use two of them: crop to the framing, then either scale with the output width box here or hand the file to the Image Resizer for more control, and finish with the Image Compressor when a site enforces a kilobyte limit rather than a pixel one. Doing all three as separate steps sounds slower, but each tool can show you the exact before and after, which is how you avoid a blurry upload.
Cropped it, now make it smaller?
The Image Compressor shrinks photos with a quality slider and shows you the exact bytes saved: same privacy, same speed.
Open Image Compressor