Resize Image for an Online Form: Exact Pixels, No Upload
Resize an image for an online form, passport photo or profile picture right in your browser: by width, height, box or percentage. No upload, no signup, batch processing, and your files never leave your device.
Resize your images
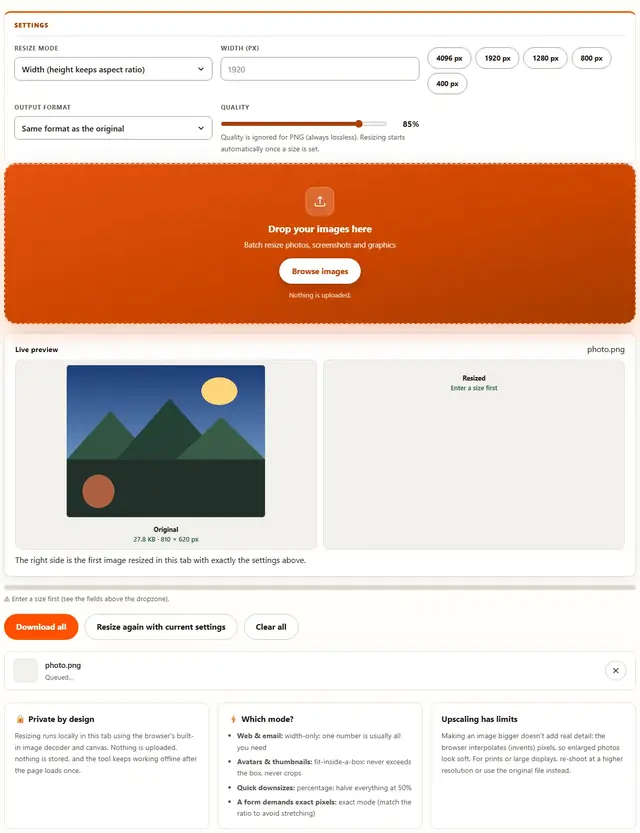
Quality is ignored for PNG (always lossless). Resizing starts automatically once a size is set.
Drop your images here
Batch resize photos, screenshots and graphics
Nothing is uploaded.
The right side is the first image resized in this tab with exactly the settings above.
Image Resizer — illustrated, step by step
How to resize an image
Three steps, about ten seconds, no technical skills needed.
Add your images
Drag JPEG, PNG or WebP files onto the dropzone or click to browse. Drop a whole batch: they resize one after another.
Choose a mode & size
Width-only is the safest default: it keeps the aspect ratio automatically. Use fit-inside-a-box for avatars, percentages for quick downsizes, or presets for common web widths.
Download the result
Each row shows the exact before/after dimensions and file size. Download one image or grab all of them with a single click.
How resizing actually works
Width vs height vs box
Every image has an aspect ratio: its width divided by its height (a 1920 × 1080 photo is 16:9). Change one dimension without the other and the picture stretches or squashes. That's why width-only and height-only modes are the safest choice: you set one number, and the other follows the ratio automatically, so nothing distorts. Fit-inside-a-box does the same while guaranteeing the result never exceeds both box dimensions (perfect for avatars and thumbnails). Exact mode forces both dimensions, so only use it when your target has the same ratio as the original (or when a form demands specific pixels and a little stretching doesn't matter).
Troubleshooting
The resized image looks blurry: what happened?
You probably enlarged it. Making an image bigger doesn't add real detail: the browser interpolates (invents) pixels, which looks soft. Downsize instead, or use the original file for prints.
The result is barely smaller than the original
Resizing smaller usually shrinks files a lot, but PNG screenshots can stay large. Switch the output format to WebP or JPEG for a much smaller file, or combine resizing with the Image Compressor.
Why aren't HEIC and animated GIFs supported?
Browsers can't decode HEIC (the iPhone default), and they can only read the first frame of an animated GIF: resizing would freeze the animation. Export those files as JPEG first (on iPhone: Share → Options → Image Format → JPEG), then resize them here.
What's the difference between width, height and box mode?
Width and height modes change one dimension and let the other follow the aspect ratio, so nothing distorts. Fit-inside-a-box guarantees the image never exceeds both dimensions and never crops. Exact forces both dimensions and can stretch the picture if the ratio doesn't match.
Are my images uploaded?
No. Resizing happens entirely in this browser tab. There is no upload step and no server processing. You can verify it: open DevTools → Network, resize a file, and watch nothing get sent. Privacy policy.
How do I resize an image to 500x500?
Pick fit inside a box and enter 500 for both numbers when the source is already square. That returns exactly 500 × 500. A rectangular photo instead comes back smaller in one direction, for example 500 × 375, because nothing is cropped. If a form insists on exactly 500 × 500, use exact mode and accept a slight stretch, or crop the source to a square first.
Does resizing an image reduce quality?
Downscaling does not, in any way you can see. The browser keeps the detail that fits at the smaller size, so the photo looks the same on screen while carrying fewer pixels. Two things do change quality: enlarging, which invents soft pixels, and re-encoding, where JPEG and WebP at 85% stay visually clean while PNG remains lossless no matter what.
Learn more
Why pixel dimensions matter more than quality settings (and the exact sizes forms ask for): Compress a Photo for Online Forms.
Resize image for online form uploads
A portal doesn't judge your photo by eye: it checks pixel width, pixel height and file size in KB, then rejects the upload if one is off. Fix the first two here: drop the photo in, type the dimensions from the notice, and each row shows the new pixels beside the new file size. A KB ceiling usually falls too: finish that in the Image Compressor or follow the photo-for-forms walkthrough.
The portal's own notice is final; these are the sizes US services ask for most often:
| Where you're uploading | Pixel size to hit | Mode |
|---|---|---|
| US passport or visa photo | 600 × 600 px (2 × 2 in at 300 DPI) | Exact if square |
| USCIS photo upload | 600 × 600 px | Box 600 × 600 |
| LinkedIn profile picture | 400 × 400 px | Box 400 × 400 |
| Instagram feed photo | 1080 × 1080 px | Box 1080 × 1080 |
| eBay listing photo | 1600 px longest side (enables zoom) | Width 1600 |
| Email attachment (Gmail: 25 MB) | 1600 px wide is plenty | Width 1600 |
| School or job portal | often 200 × 230 or 350 × 350 px | Exact, per the brochure |
Which resize mode should you use?
Five options, and only one can distort a picture. Nothing here ever crops, so the question is what your destination enforces:
| Mode | What it does | Use it when |
|---|---|---|
| Width | Height follows the aspect ratio | Web pages, email and listings that cap width |
| Height | Width follows the aspect ratio | Fixed-height banners and headers |
| Fit inside a box | Never exceeds either number, never crops | Avatars: LinkedIn 400 × 400, Instagram 1080 × 1080 |
| Exact width and height | Forces both numbers | Portals that validate exact pixels |
| Percentage | Scales both dimensions | Batch downsizes: 50% halves everything |
When in doubt, use width: most sites enforce a single number, the ratio takes care of itself, and the preset row (4096, 1920, 1280, 800, 400) covers the common widths.
How to resize an image to 500x500
Square targets are everywhere: avatars, profile slots, marketplace headers, forms asking for 500x500, 350x350 or 600x600. How you get there depends on your source:
- Source already square: fit inside a box at 500 by 500 returns exactly 500 × 500. The clean path.
- Source is 4:3 or 3:2: box mode returns the biggest image that fits (500 × 375) because nothing is sliced. A strict validator still reports wrong dimensions.
- Portal demands exactly 500 × 500: use exact mode. A slightly squashed face is easy to miss at avatar size; stretched text is not, so crop the source square first for documents.
- Confirm before downloading: every row prints before and after dimensions. If it doesn't read 500 × 500, switch modes and press Resize again with current settings.
Resize image without losing quality
Downscaling is the safe direction: the browser keeps every detail you could already see and drops only what the smaller canvas can't hold, so the picture looks identical while carrying fewer pixels. Enlarging hurts: the browser invents pixels, and invented pixels look soft whatever you do afterwards.
The settings that protect the detail you have
- Keep the original format: a JPEG resized as JPEG at the default 85% stays visually clean.
- PNG ignores the quality slider because PNG is lossless: ideal for logos and screenshots, and the reason PNG files stay heavy.
- Swap formats only when asked: if a portal demands JPEG and your file is PNG or WebP, the Image Converter does it in one drop.
- Never enlarge for print: interpolation cannot recover detail that was never captured.
Change photo size in KB, not just pixels
Pixels are the biggest lever, not the only one. Resize to the exact dimensions, then compress at around 80% until the file lands inside the required range: 20–200 KB is the usual bracket. Watch the before and after number in the Image Compressor, and the KB-limit walkthrough explains each rejection message.
Use cases: from passports to rental listings
Six situations cover most US uploads, each down to a number the destination will accept.
Resize image for passport, visa and ID photos
US passport and visa photos are square: 2 × 2 inches, or 600 × 600 pixels at 300 DPI, and USCIS uses the same square. Phones shoot 4:3, so crop square in Paint first, then run exact 600 × 600 here. Head size and background follow the State Department's rules: pixels are all this tool controls.
Resize image for LinkedIn profile picture and dating apps
LinkedIn asks for 400 × 400 px and shows it small, so upload a square master around 1000 × 1000 from box mode: it survives the crop, stays sharp on dense screens and doubles as a dating-app photo. Most dating apps crop square or tall, and a 1000-pixel square gives them a clean source.
eBay and Poshmark listing photos
1600 px on the longest side is what eBay's zoom requires, and width mode gets a 4:3 phone photo there without cropping it (1600 × 1200). Poshmark crops to its own frame, so a 1600 px master keeps that crop crisp.
Rental and Zillow uploads
Listing photos sell rooms, so do not shrink them just to be safe. Around 1600–2048 px wide keeps interiors readable on a big screen while staying under any file cap; if an upload fails on size, drop to 1200 px and output JPEG.
School, scholarship and job portals
Application portals are the strictest: a fixed size such as 200 × 230 or 350 × 350, a KB ceiling, often .jpg only. Exact mode covers pixels, the compressor covers KBs, and matching the brochure gets it accepted first try.
How to resize a photo on Windows 11 without Photoshop
In Windows 11, right-click the photo and open it in Paint, choose Image → Resize → Pixels, type the width, leave Maintain aspect ratio checked and save a copy. For a folder this page is faster: identical settings, before and after dimensions on every row, originals untouched.
What we actually tested
Claims are cheap. Here is what we ran and what the tool printed:
- Width mode: a 4000 × 3000 JPEG set to width 1600 returned exactly 1600 × 1200, the new file size printed beside it.
- No upload: DevTools → Network showed no request carrying the file: no fetch, no XHR and no FormData in the resize path.
- Enlarging: 300 × 225 up to 1200 × 900 returned the requested size with soft edges, because interpolation guesses between pixels.
- Exact mode: forcing 4:3 into 500 × 500 came back exactly 500 × 500 and looked squat. It does what you type.
- Batch: a mixed JPEG and PNG folder processed in one tab, each row printing its own before and after; Download all fires sequentially.
- Large images: inputs stop at 12,000 px because canvas memory has a ceiling: a panorama can fail on a phone. Halve in percentage mode first, then enter the target.
- WebP: in a browser that cannot encode it, the option is grayed out instead of failing mid-batch.
Limits worth knowing before you start
- No real upscaling: enlarging adds pixels, not detail: go back to the original for prints.
- HEIC and animated GIFs are unsupported: browsers cannot decode HEIC, and a GIF would freeze on frame one. Export as JPEG first.
- Exact mode can stretch: it guarantees the numbers, not the shape.
- Nothing is cropped: box mode fits rather than slices, so a 4:3 photo in a square box comes back rectangular.
- PNG stays large: lossless encoding still stores every remaining pixel: switch output to WebP or JPEG for KB limits.
- Nothing persists: results live in this tab and vanish when you close it.
Beyond resizing, the full tools directory covers PDFs, QR codes and metadata, all in the browser, all free.
Also shrinking images?
The Image Compressor handles JPEG, PNG and WebP with a live quality slider (same privacy, same speed).
Open Image Compressor